Hi Friends,
Thank you so much for all the warm comments and for those who reached out to me last week. Your words of encouragement and support for the new Heartfelt Card Making with Spellbinders and More facebook group has been overwhelming. Make sure to keep spreading the word.
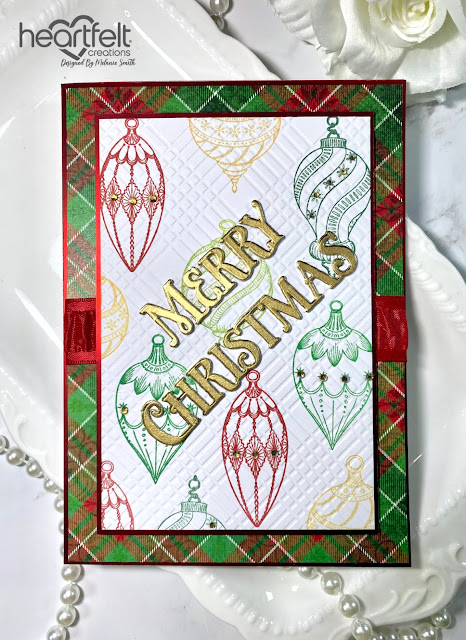
Today I am sharing my second card featuring the Holiday Ornament Collection. I went super basic here for a clean and classic mail-able card. I hope you enjoy it.
Directions:
Cut a piece of white card stock measuring 7 x 10” and score at 5” for a side folding card base. Cut a piece a red mirror card stock to 5 x 7” and adhere to the front of the card base. Now from the HCDP1-2153 Holiday Ornament Paper Collection cut a piece measuring 4 7/8 x 6 7/8” from sheet 4B and before gluing it attach a piece of 1” red ribbon around it and secure it to the back. Now attach this plaid piece of paper to the card front.
Next cut a piece of red mirror card stock to 4x6” and cut a piece of white card stock to 4 7/8 x 5 5/8” Using a stamp positioner, stamp the small ornaments from the HCPC-31031 Noel Holiday Ornaments Cling Stamp Set and HCPC-31030 Sparkling Holiday Ornaments Cling Stamp Set onto the white card stock in Sunflower, Emerald Green, Olive Green, and Red Geranium Archival Inks. Then run this paper through a 2D embossing folder for a fun textured look. Once embossed glue it to the red mirror card stock and attach the layers to the card base using 3D foam tape along the top half and bottom half of the card leaving room for the 1” ribbon to run along the center behind the panel.
Next stamp the “Merry Christmas” Sentiment from the HCPC-3995 Starry Holiday Greetings Cling Stamp Set onto Luxe Gold Card stock using Versamark Ink, and heat emboss using Gold Embossing Powder. Die cut it with the coordinating dies. Also cut 3x from white card stock. Stack and glue together with the gold on top. This gives the card front dimension all while still keeping the card clean and simple and easy for mailing. Lastly add mini rhinestones to assorted ornaments to give the card a little extra shine. Finish the inside as desired.
I hope you enjoyed that as much as I enjoyed creating it for each of you! Check out my personal project in the Heartfelt Creations Gallery to find out what products I used for this project.
Also, please be sure to visit the Heartfelt Creations Blog to see all of the gorgeous projects created by the other amazing design team members.


No comments:
Post a Comment