A whimsical place to play, where paper and ink become one.

Friday, April 24, 2015

Focal Friday's ~ Pretty & Pink w/ a Fun Tutorial

Hi Friends,

I have a lot to share with today's Focal Friday's Post. I have been having a lot of fun taking photos of flowers in and around my yard. These are the different pink azaleas that are blooming like crazy. I just love how vibrant they are.


Stampin' Up! has just posted their new Retired List of items in preparation for the new catalog release coming in June. The Mixed Bunch Stamp Set and the matching Blossom Punch are both on the chopping block. :-( I absolute love these and I am sure you will too. Check the Retired List to see these and other items that are being retired.


An amazing customer and friend, Mary Telles, came to me asking about how I color and what she could purchase from me to color like I do. Well since the Stampin's Up! Blendabilities have been discontinued and we currently do not have another alcohol marker available to us I decided to see if I could get similar results using our Classic Ink pads along with our Blender Pens. I really like that I was able to get the "Shaded" look that Mary is going after. Below I show a tutorial to help with the technique.


When working with our Classic Ink pads simply squeeze the pad before opening then open the pad up. Ink will be on the inside of the lid. You then dip your blender pen into that ink. As you use the pen the ink will begin to fade so make sure you use it at first in the area that you want to be the darkest. When you finish your stroke lift the pen for a lighter stroke on the end. 


Step 2: Begin layer one with Strawberry Slush Classic Ink Pad( Retiring) using the blender pen.

Step 3: Layer a second layer of Strawberry Slush keeping your strokes closer to the center. This gives the darker effect in the center of the flower.

Step 4: Using Blushing Bride Classic Ink Pad begin on the end of the petal and work towards the strawberry slush colored area over lapping them slightly. You will notice that the colors do not really blend much at first but when you so step 5 they will. 

Step 5: Returning back to the strawberry slush start your strokes in the center again dragging your stroke to the intersection of the two colors lifting with the tip of the pen. This gives a nice gradient in colors. 

Step 6: Using the Blossom Punch (Retiring & Currently 50% off) to punch the flower out. 

Step 7: I used a touch of Pistachio Pudding Classic Ink Pad (Retiring & Currently 50% off) around the edges of the punch to give it a slight background color.

Below are two more samples. I used All Abloom Designer Paper Stack (Retiring & Currently 50% off) for all the floral papers. Doesn't it go perfectly with the Mixed Bunch Stamp Set?


 At the time of publishing this blog post all items are currently available to order. They are while supplies last though, so please don't delay in ordering or you may miss this awesome deal.

Have a Pretty & Pink Day!
Melanie


Built for Free Using: My Stampin Blog

Friday, April 17, 2015

Focal Friday's ~ Tiddly Inks NEW STAMP Release ~ Wryn The Mermaid

Hi Friends,

Welcome back to a super special Fairy Stamp Land Focal Friday edition. I have selected a color scheme that is out of my comfort zone and I really like the results. The teals and browns have always been a color grouping that I have loved but adding the yellow into the mix really makes the colors stand out and get noticed. 


I have used the newly released image from Tiddly Inks called "Wryn the Mermaid" I have colored her hair with Copic markers using a striped technique. Below you can see the step by step color progression I prepared for you.


I am entering this card into the Tiddly Inks Design Team Call. Make sure to click on over to their blog to show your love for all the designers who are trying out. They also have a really cute freebie image available!!!


Here is one last look at my card up close and personal. I had so much fun designing this using today's Focal Friday color scheme. I hope it has given you some wonderful weekend inspiration.


Melanie


I would like to acknowledge the following sites for their wonderful inspirational photos. The first photo is by Design Seeds and can be found both on Pinterest as well as HERE.


This second photo also came from Pinterest and is by Spoiled Royal Studio. To see the artists current work simply click HERE


Sunday, April 12, 2015

The Paper Nest Dolls Release Party!!!!

Hello Everyone,

Today I have a really sweet card using The Paper Nest Dolls newly released stamp named "Friendship Umbrella". I just fell in love with this new image because it isn't very often that you find a stamp with two people in it. In this NEW RELEASE there is not just one, but TWO. Make sure to check them all out in the Paper Nest Dolls Online Store.


I love the color combo purple/green but when you add yellow to the mix it really gives a POP to your project. The stamped image is colored with Copic Markers and die cut using Oval Accent Bigz Die. I decided on a 5x7 card base, due to the size of the die. The striped background Designer Paper is from the Painted Blooms Collection from the current Occasions Catalog.


The spotted paper to the left of the image is from the "Sweet Taffy" Designer Series Paper (item #133693) As you can see in the above photo I colored a few of the spots yellow. I did this with a Daffodil Delight Stampin Write Marker (Item # 131259)

For the Sentiment I used the Tag Talk Stamp Set (Item #134249) along with the matching  "Label Bracket" Punch (Item #132153), as shown in the collage above. I absolutely adore matching stamp & punch sets.... Besides my Big Shot (Item #113439) and dies, I would probably say these sets or my most loved of all Stampin' Up! products. I had a little fun with the "Label Bracket" punch as you can see.  After stamping the sentiment I wanted to frame it as well to help it tie in with the entire color scheme. So I punched a second piece of Card stock and rotated the two to create a fun framed sentiment.

All Items are linked below for easy clicking. Thank you for stopping by today. I really appreciate having you here. Feel free to message below if you have any questions or send me a message with the easy "contact me" email option on the sidebar. Happy Sunday Everyone!

Melanie
Built for Free Using: My Stampin Blog

Friday, April 10, 2015

Focal Fridays ~ Need Some Inspiration?


Hi friends,

I have been challenged by the online class I am taking called "Better Blogging in 4 weeks" to focus more on creating worthy posts, that are a little different than the norm, in hopes to attract more traffic to my blog. The goal, after all, is to share what you love with others, and that all begins by you clicking on my posts. I have been thinking a lot about this and have come up with "Focal Fridays". I will choose a focal photo or group of photos each week and share my project created from that focal image. This weeks photo collage came right from my own front yard.

We have a large rose bush right outside my front door. It is about 8 feet tall, and this is the second year it has been used as a safe haven for a mama bird to make a nest. If you look really close you can see mama's eye peeking at the camera. The huge rose bush gives a good camouflaged home for the little family.


Here is a close up of my card. I have used numerous Stampin' Up! products including the "All Abloom" 4 1/2 X 6 1/2 designer paper sold on page 185 of the core Stampin' Up! Brochure, or online HERE. This paper is perfect for card fronts. I have taken a green and white floral paper and colored in the flowers with markers. See below for "Before & After" photos.

I wanted to draw attention to the bird builder punched out image so I played around with my hexagon punch and made these adorable little banners. The Hexagon punch is available on page 222 of the core brochure or online HERE. The Bird Builder punch is available on page 22, or HERE. I love the perfection these punches and the finished look.

https://blogger.googleusercontent.com/img/b/R29vZ2xl/AVvXsEhdOSOsFAM_C8tegHui0GreUu7RWEOvt5utpDxpWjxQiLrTi2bJL_m8j_QjbCAQjxES6L7xGzt_UvjBr5WL3NESzoZPRjupx7bkgVHcAay9vxMtWF_2sB1hFK150d6JavfJr8Jy95i4ZWBS/s1600/Mojo392.gif


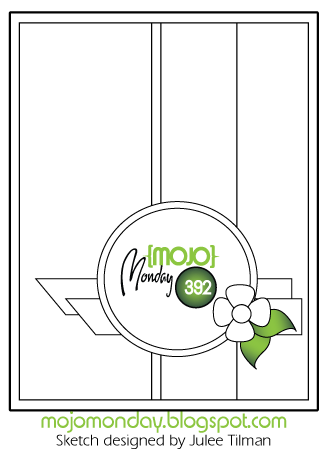
I also used this awesome sketch as inspiration for the card layout and will be entering into the Mojo Monday Challenge Blog. 

Below are all the Stampin' Up! Products used in the making of this card. Thank you for stopping by today. I hope the focal used will inspire you to design something beautiful!

Melanie


Built for Free Using: My Stampin Blog


Tuesday, April 7, 2015

Copic Color Progression ~ How I Color Skin & Hair

Hello Crafty Friends,

The beauty of spring is my favorite time of year. We have lived in our home for two years now and currently our yard is bursting with color just like last year. The growth of spring reminds me of growing as an artist. I constantly look for ways I can better myself. Today's card was inspired by the beauty that surrounds me.. I hope this card gets you into the mood to share spring with me. Over the next couple of posts I will be sharing more on this topic.

To get us started I have a card I have made using an adorable Paper Nest Dolls Stamped Image called "Sitting Pretty Avery". I think I have a brand new love. Everyone knows I am a sucker for things with wings. These Butterfly Thinlits Dies from Stampin' Up! are right up my alley. Just in-case your interested, they can be found on page 26 of the Occasions Catalog.

While working on this piece I had fun with my camera taking step by step images while coloring the skin & hair. I have created a Copic Color Progression shown below. Be sure to leave me a message if you find this helpful. 

I have used the following items when creating this project:
Copic Colors:
Skin: E000,E00,E04,E11,E21, R20
Hair: E30,E31,E34
Flowers & Grass: Y15,Y19,YG61,63,&67

Built for Free Using: My Stampin Blog


freeshippingcurrentLast but not least I don't want you to miss the Stampin' Up! FREE SHIPPING EVENT! From now until Friday order the items you are dying to get your hands on simply by going HERE! Thank you for stopping by...Have an amazing week!

Melanie

Sunday, April 5, 2015

Sharing Myself With You ~ Part 3

Welcome back friends,

This is the final installment in "Sharing Myself With You". Today I am going to share my Past, Present, and Future when it comes to the creative side of me. I have participated in many crafts and have excelled at a few of them. When I was around the age of 12 my sister taught me to cross stitch one summer. From then on I have always had a project in the works, if not many. I have dabbled in cross stitch, crochet, knitting, plastic canvas, beading/jewelry making, quilting, lamp working, and currently my passion is for paper crafts.


Here is a photo from a calender sold by Hancock Fabrics in 2003. My very first quilt is pictured here. I made this quilt with a purpose. My Aunt passed away in 2001 and she had a special place in her heart for St. Jude. When I saw that Hancock Fabrics and St. Jude were teaming up for the first annual "Quilt of Dreams" contest I knew I had to design and submit a quilt. Over 700 quilts were entered nationwide. I submitted mine on the 1 year anniversary of my aunt's passing. Making this was like therapy for me. Our quilts were suppose to answer the dreams of the children at St. Jude's Hospital. So I designed this quilt with that in mind. My thought was, no matter what, every child just wants to go home. So my "Welcome Home" quilt has homes...some with children in their windows and some waiting for the children to arrive home. My quilt was the 2002 National Winner ~ Most Original and was displayed at a museum in Tupelo Mississippi. I was asked by Hancock to attend the opening night and got to go see my quilt on display. From there it toured the country before being donated to a child at St. Jude's Hospital. It is one of my most proud moments and I know my aunt would of just loved it.


Above shows you my lamp working workbench along with jewelry and beads that I have made. "Lamp work" is similar to glass blowing only without the blowing ;-) I used a 2000 degree torch to melt glass rods over a mandrel to create the large beads shown in the above pieces. My favorite piece is the one in the top right. I just loved the colors and I carefully drew roses onto the bead with thin pieces of glass. Once crafted the bead goes into the kiln for many hours. Usually by the next morning I would get the beads out of the kiln, take them off their mandrels (which created the whole in the bead) and then I would carefully clean the bead so it is ready to use. I sold many sets and focal beads on ebay back when I had my online bead shop.


Here is a glimpse into my crafty world. I love to create and share my love of crafting with others. That is the reason I participate in design teams and why I love sharing Stampin' Up! with my following of friends. Getting together with friends no matter if it is locally or online bring me so much joy. My blog moto is "A Whimsical Place Where Paper and Ink Become One" This pretty much sums me up. My future is yet unknown but at the present moment I feel like design team work and growing my Stampin' Up! business will continue to help me grow as an artist. I hope you all have enjoyed learning more about me. I would love to learn more about each of you.  Feel free to contact me anytime using the "contact form" option on the left side board of the blog. I would love to share crafting with YOU!
Melanie

Saturday, April 4, 2015

Sharing Myself With You ~ Part 2

Hello Friends,

Thank you for stopping by today to get to know me a little better. I am doing a 3 part blog series all about sharing myself with all of you. If you missed "Part 1" You can find it HERE. Tonight I am answering the question... "Who are your favorite people to spend time with?"This question was an easy one....My Family!

Back in 2013 my husband and I made the choice to move to Atlanta to be closer to our mother's. This was a hard decision as it included leaving our two adult children behind. They were both in college and we did not want our choice to interfere with their education. So they both decided to share a 2 bedroom apartment so that they could afford to live on their own. I am very proud to say that they have done great. Our oldest child, Michael, is out of school now and is 26 years old. Nicholette, our middle child, is still attending school working for her nursing degree. She also works part time as a CNA at a local hospital. She turned 21 back in February. Below is a little bit more about each of them.

 Michael is not one who likes photos, but he did bless me with this one in 2013 before we moved. It was actually during the meal after my personal graduation from college. It was the best grad present I received. Michael is an Eagle Scout and still loves volunteering as often as possible. Michael and I have a close bond and I love him dearly.


.
Nicholette on the other hand is the "selfie queen". She has two particular sides of her...one is a school bookworm always studying and trying her best. The other side of her is pure DIVA. She is a beautiful young lady with a heart of gold and is going to make one amazing nurse.


Here is our youngest. These photos were taken on Zachary's 16th birthday back in September 2014. He is currently a junior in high school and will be graduating in 2016. He is focused on keeping his GPA as high as possible so he can attend college. His plan is to study engineering. In his downtime he spends most of his time online with his friends playing video games or watching and recording his own youtube videos.

This is just a fun collage sharing other photos of these amazing people. Randy's mother is pictured with Nicholette in the top left photo and my mom is hugging Randy in the top center photo. We have wonderful relationships with both of our mom's and do not regret our choice to move closer so we can spend more time with them

I will be back with the final installment in this series on Sunday. I will be sharing my creative side with all of you, including a few photos of my craft room. I hope to see you back here soon. I would be honored if you would be so kind as to "follow" my blog. Feel free to also leave a comment so I can get to know better as well. I want to wish everyone a Happy Easter Weekend.

Melanie 


Wednesday, April 1, 2015

Sharing Myself With You ~ Part 1

Hello Friends,

Currently I am participating in an amazing online class called "Better Blogging in 4 weeks". During week one part of our homework was reflecting on ourselves and answering questions such as:

"What are your favorite things?"
"Who are your favorite people to spend time with?"
"Why do I blog"?

So after thinking a lot about many questions asked of us I have decided to share with you this week a little bit about myself with all of my friends. I will answer the first question in this post and will post part 2 & 3 later in the week. I hope you will come back and visit each post :-)


Here is a photo taken of me back in January while traveling in Hawaii with my mother. It was just a quick selfie but I think it shows my fun and outgoing personality. Traveling is one of my joys in life and I adore traveling with both my husband as well as my mother. Here is an array of photos taken in Hawaii in January. We made so many wonderful memories!


I have been married to my husband, Randy, for nearly 22 years. We have a wonderful life and are more in love today than the day we were married. Marriage takes a lot of work, but when it is good it is so worth the effort. 


This photo was taken on our 21st anniversary back in May 2014 while exploring the North Georgia Mountains together. You can get a feel for Randy's personality just by reading his tee shirt. heeheehee

Before I go I just want to quickly touch on the first question listed at the top of this blog post.... "What are my favorite things?" I have mentioned "Traveling" & "Marriage" already, but to answer the question completely I would have to also add "Spending time with my family" along with "Being Creative & Sharing my Creativity with others." I will share a lot more details about these other two areas of my life in the posts to follow. Check back with me on Friday when I share with you all about my family and Sunday I will share photos and information about my creative world. Until then I hope your week is a beautiful one.

~Melanie~