A whimsical place to play, where paper and ink become one.

Thursday, February 28, 2019

LDRS Creative New Release Day 2 ~ Playful Patterns


Thank you for joining us on our LDRS Creative inspiration week blog hop! We are so excited to feature what was showcased at Creativation in January! There are lots of gorgeous projects using products from our new release. You can even see them in action with step-by-step projects by our amazing designers on their blogs and our own LDRS Creative Youtube channel (make sure you subscribe)!

In this release, we are introducing interactive stamp and die combos, fabulous paper doll dies, and TONS of products to fit everyone's taste!

There are two brand new full size stamp sets from Cre8tive Cre8tions, each combining 8 stamps; Celebration and Flower Power!


Next, we have something for all our Polkadoodles fans! We have two brand new characters, each featuring lovely scenes: Ruby (Celebration, Pretty Cute, So Sassy) and Holly (Delightful Daisy, Feathered Friends, Story Time, Watch It Grow). And fear not, Winnie is also joining the party with the mini set called Let's Go, and some amazing paper doll dies in the Die-licious collection to create to your soul content: A Gift For You, Miss Pretty, Puppy Princess, Super Scenes. What's best is that we came up with the perfect 6"x6" Die-Licious paperpack to combine all skin, hair and clothing patterns as a perfect complement!

If you are more into flowers, then you will simply adore these brand new stamp and die combo sets: If Friends Were FlowersLove And Smell The Roses.

And did we say we were throwing a surprise party for you all? Thanks to these sweet stamp sets, you can have one, too: Wordalicious, Sweet Treats, Party Time, Life Is Sweet, Ice Cream Party, Goody Gumdrops!

What's even cooler are the interactive stamps (and some even as a die combo!) we are proud to have designed: Going Places, On The Move-NeighborhoodOn The Move-Landscape. Adorable critters? Yes! Right here: On The MoveHippo Hooray, Super Critters!

We also have FOUR new die sets that will help you get a professional look in no time, on top of being simply adorable: Twirling Pop-Up, Barber Stripes Rectangle, Fringe, Scalloped Borders.

Who's ready for mini hybrid inks? We are adding the latest two sets of our very popular Hybrid inks in a mini version, perfect for ink blending, stenciling, stamping, colouring and embossing: At The Beach and On The Farm!

Next, we have two new 6"x6" stencils that are sure to be as popular as the others: Playful Patterns and the Waffle!

Lastly, because we wanted to give you the perfect time with papers AND stamps, we created the new Playful Pattern collection that includes 6"x6" and 12"x12" packs: Homemade Happiness, Candy Counter, Sweet Sensations!

 And you can grab the entire release in bundles, because you KNOW you need them all!

Simply use the list at the end of the post to keep hopping!
Each day we are giving away a $25 LDRS Creative gift card to one lucky hopper! To enter leave a comment on each blog in the hop, plus follow us on Facebook and Instagram. Winners will be announced on the LDRS Creative inspiration blog on March 5th.

AND for the release event we are excited to offer some great savings!
Save 15% on the new release*, including already discounted bundles and use code FEB15
(*Coupon valid until midnight EST 3/6/18)

 For my personal card I have used the Life is Sweet Stamp Set.


  For the sentiment I used some Raven Hybrid ink and black embossing powder.


I have also used the really cool Playful Patterns Stencil along with some texture glitter paste for the red glittery paper. Make sure you also see the brand new papers HERE.


Hop along and leave a comment so you could win! ****(please add the brackets next to your name with ‘you are here’ so hoppers can easily keep track – add the specific list to each day; not all three at the same time ;-))


Day 2:


And make sure to be back tomorrow for more inspiration!


Wednesday, February 27, 2019

LDRS Creative 3 Day Release ~ Sweet Sensations


Thank you for joining us on our LDRS Creative inspiration week blog hop! We are so excited to feature what was showcased at Creativation in January! There are lots of gorgeous projects using products from our new release. You can even see them in action with step-by-step projects by our amazing designers on their blogs and our own LDRS Creative Youtube channel (make sure you subscribe)!

In this release, we are introducing interactive stamp and die combos, fabulous paper doll dies, and TONS of products to fit everyone's taste!

There are two brand new full size stamp sets from Cre8tive Cre8tions, each combining 8 stamps; Celebration and Flower Power!


Next, we have something for all our Polkadoodles fans! We have two brand new characters, each featuring lovely scenes: Ruby (Celebration, Pretty Cute, So Sassy) and Holly (Delightful Daisy, Feathered Friends, Story Time, Watch It Grow). And fear not, Winnie is also joining the party with the mini set called Let's Go, and some amazing paper doll dies in the Die-licious collection to create to your soul content: A Gift For You, Miss Pretty, Puppy Princess, Super Scenes. What's best is that we came up with the perfect 6"x6" Die-Licious paperpack to combine all skin, hair and clothing patterns as a perfect complement!

If you are more into flowers, then you will simply adore these brand new stamp and die combo sets: If Friends Were FlowersLove And Smell The Roses.

And did we say we were throwing a surprise party for you all? Thanks to these sweet stamp sets, you can have one, too: Wordalicious, Sweet Treats, Party Time, Life Is Sweet, Ice Cream Party, Goody Gumdrops!

What's even cooler are the interactive stamps (and some even as a die combo!) we are proud to have designed: Going Places, On The Move-NeighborhoodOn The Move-Landscape. Adorable critters? Yes! Right here: On The MoveHippo Hooray, Super Critters!

We also have FOUR new die sets that will help you get a professional look in no time, on top of being simply adorable: Twirling Pop-Up, Barber Stripes Rectangle, Fringe, Scalloped Borders.

Who's ready for mini hybrid inks? We are adding the latest two sets of our very popular Hybrid inks in a mini version, perfect for ink blending, stenciling, stamping, colouring and embossing: At The Beach and On The Farm!

Next, we have two new 6"x6" stencils that are sure to be as popular as the others: Playful Patterns and the Waffle!

Lastly, because we wanted to give you the perfect time with papers AND stamps, we created the new Playful Pattern collection that includes 6"x6" and 12"x12" packs: Homemade Happiness, Candy Counter, Sweet Sensations!

 And you can grab the entire release in bundles, because you KNOW you need them all!

Simply use the list at the end of the post to keep hopping!
Each day we are giving away a $25 LDRS Creative gift card to one lucky hopper! To enter leave a comment on each blog in the hop, plus follow us on Facebook and Instagram. Winners will be announced on the LDRS Creative inspiration blog on March 5th.

AND for the release event we are excited to offer some great savings!
Save 15% on the new release*, including already discounted bundles and use code FEB15
(*Coupon valid until midnight EST 3/6/18)

For my personal project I have created this card showing off the Sweet Sensations 6x6 paper stack . 
I used the Scalloped Border Die set as well.


For the sentiment I have used the breand new "Party Time" stamp set.


 I even decorated the inside of the same stamp set. Isn't it cute?

One last look before you go hopping.....


Hop along and leave a comment so you could win! ****(please add the brackets next to your name with ‘you are here’ so hoppers can easily keep track – add the specific list to each day; not all three at the same time ;-))

Day 1:
And make sure to be back tomorrow for more inspiration!


Sunday, February 24, 2019

LDRS Creative ~ Let Love Grow

Welcome back friends,

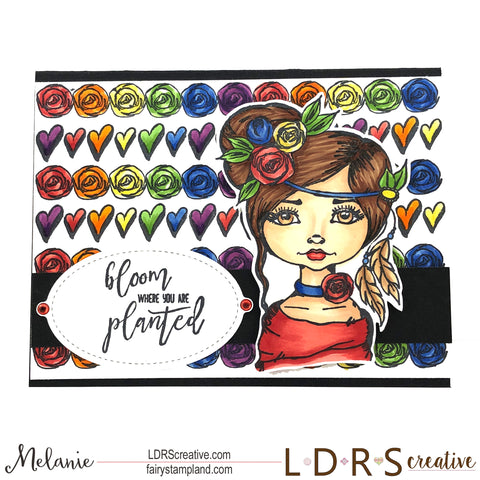
Today I am here sharing my newest card featuring LDRS Creative products. I really enjoyed an evening coloring while creating this stamped background.


As you can see I was in a rainbow mood while creating this. The first thing I did was carefully stamp the background using two border stamps that are a part of the "Let Love Grow" stamp set.


To make sure I got good even coverage of ink as well as getting the stamps close enough together I decided to use my Stamparatus. I stamped the first row of roses and then I removed that stamp and placed the heart stamp butted up close to the roses. By doing this time after time it allowed for an evenly spaced design.


Let the coloring begin!!! I used Copic markers, a light and a dark from each color family. Super easy! Here are a few other photos of the finished project.


And a close up of the coloring of the girl stamp which I did pop up using dimensional squares.


The sentiment is also from the "Let Love Grow" stamp set and was die cut using the "Scalloped Rectangle Die Set"


Thank you for stopping by today. I hope I have inspired you to think outside the box. When you have a design idea just GO FOR IT!
 
Melanie

Saturday, February 23, 2019

Sparkle N Sprinkle ~ Heat Embossing A Sentiment Die

Hi there everyone!

Today I have a colorful card to share using a (New to me) technique. Using Sparkle N Sprinkle products I decided to show off different dies. I was going for a Batik look and I just love how this turned out.


Sparkle N Sprinkle Products List:

Tonic Everyday Sentiment Die Set 1
Tonic Archway Stripe Invite Insert Die Set

For this card I used Versa Mark along with our Mulberry Opaque Embossing Powder EP415  to jazz up the sentiment die. I simply stamped the die cut with Versa Mark ink and heat embossed it with the Mulberry Embossing Powder. Make sure to use tweezers so you do not burn yourself when heat embossing. I did 3-4 layers of embossing powder to create more dimension.


Here is another look... 


I added some Nuvo Glitter Drops in Champagne to little areas of the top and bottom Tonic Archway Stripe Invite Insert Dies It just gave it a little extra glitter.
One last look... 


I hope I have helped inspire you today. Have a fun and creative day!
Melanie

Saturday, February 16, 2019

Sparkle N Sprinkle Showers & Tulips

Hi Friends,
Today I have a fun Clean & Simple (CAS) card to share with you.


Sparkle N Sprinkle Supplies:

For this card I wanted to show off the stunning new stamp set called Showers & Tulips Stamp Set #923. I decided to go for a CAS design and using one of Tonic Studio's Die sets I created a subtle shaped card. 

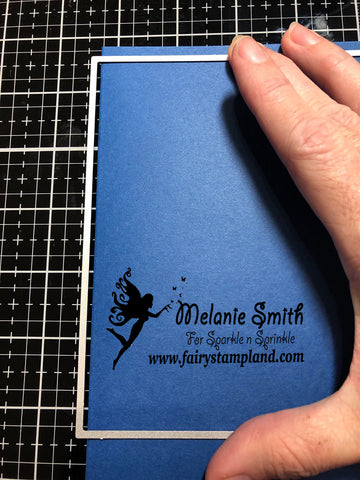
Step 1: Cut and score your card base larger than the shaped die being used from the Tonic Blocked Parquet & Garden Trellis Dies. Move your die so that the fold of the card is not being cut and run through your die cut machine. (See Below)


Step 2: Cut a second single layer of card using the full die. This will be attached to the card base previously made in step 2.
Step 3: Also included in the Tonic Blocked Parquet & Garden Trellis Dies
is a coordinating die which I used to cut my white layer with. This gives you a fun shaped card.


After coloring my stamped image I simply added Zig 2 Way Glue Pen to the areas of the flowers and sprinkled them with our amazing Diamond Dust Semi-Trans Glitter #G1116. If you don't already have the Diamond Dust you will surely want to add this to your next order. It gives such a beautiful shimmer to these flowers.


One last look before I close. I love the sentiment in the Showers & Tulips Stamp Set #923. It is just perfect.

Have a crafty day my friends... DT Melanie

Tuesday, February 12, 2019

Love in Bloom ~ Multi Layer Stamping!

Welcome Back My Creative Friends, 
 
I hope this post is finding you in a crafty mood. This is my newest project featuring the beautiful "Love in Bloom" Stamp Set by LDRS Creative. This is a multi layer stamp sets which is SO MUCH fun to play with. Just look here at all my fun flowers all stamped out using our LDRS Creative Hybrid Inks.


It was a joy stamping these flowers and they are very user friendly. Along with the Love in Bloom Stamp Set I have also used the Eyelet Lace Rectangle Die Set and  our Hybrid inks in Pink Tutu, Lipstick Jungle, Kiss Me Red, Four Leaf, Evergreen, and Raven. You can see all of our Hybrid Inks HERE.


Below is a close up of the flowers. I have used some clear glitter glue to add a little shimmer.


Thank you for crafting with me today. I hope I have inspired you to get out your stamps and inks and play today! Have a wonderful week my friends!
Melanie Smith


Saturday, February 9, 2019

Sparkle N Sprinkle May Showers w/ Copic Tutorials

Welcome back my followers,

Who is ready for SPRING already?? I know I sure am. With Spring comes flowers and growth. This new stamp set I am using today is called "May Showers" by Sparkle n Sprinkle. It is such a fun set to color.


Sparkle N Sprinkle Supplies Used:

Tonic Studios Deco Holly Rings Die Set

To create this card I started with a 6" card base. Using the Tonic Studio's Diamond Corner Dot & Drop Die for extra interest to the card base. I colored the beautiful "April Showers Promise stamp set choosing Yellow for the rain boots. Yellow is a tricky Copic color to work with so I did a step by step showing you each step with one rain boot so you can see how to get the shiny highlight in the boot.

Step 1: A light base color using Y11


Step 2: Using Y13 add color to the shadow area.


Step 3: Using Y17 continue to darken the shadows. This is your darkest marker so once added we will then use our markers in the opposite direction. (Dark to Light)


Step 4: Now with Y15 you will now begin "dragging the darker color towards the highlighted center.

Step 5: Using Y13 you will now again focus on dragging the last color towards the highlight in the center. Each time you do this you are blending the colors.


Looking at this photo above you can see where the lighter marker in each step has de saturated the over all color, and the boot looks kind of blotchy. To correct this you just add an extra layer of colors.


Step 6:  Using Y15 you will again add darker color to your shadow areas.

Step 7: Using your darkest marker add a little more depth where you are wanting your shadows.

Step 8: Stepping back down now go to your Y15 and again "drag" the darker towards the highlighted center.

Step 9: Lastly do a light blend using your lightest color (Y13) This will seamlessly blend your colors.


Here is a close up picture of the final coloring.


I hope you have enjoyed this little coloring tutorial as much as I have enjoyed creating it. Have an amazing day!

Saturday, February 2, 2019

Tonic Studio Fairy Camellia

Welcome Back Friends,

I have a nice bright and cheerful card created for Sparkle N Sprinkle. They carry a large collection of Fairy stamps and dies. If you are a fairy fan like I am you will love the Tonic Studio's  Fairy Stamp & Die Sets. Have you seen all the different Fairies we carry??? They are simply beautiful.


Sparkle N Sprinkle Supply List:
 
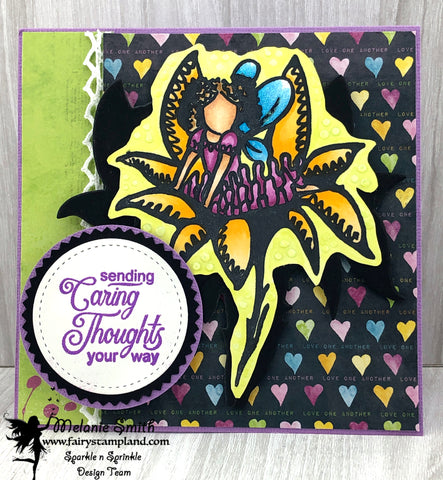
Copic markers were used for the coloring of this striking fairy. I then added Nuvo Droplets all around the outside of the stamped image. Since I did this I decided to not use the outline die at first. But then once colored I wanted to add some black shadows to the fairy so I decided to cut 2 black outline dies and I used them behind the stamped/colored image. It is so striking....hard to tell all the detail from these photos. 


in this photo you can see the translucent Nuvo droplets that I added to the lime green halo around the stamped image. For the sentiment I have used the Venus Violet Opaque Embossing Powder EP379. 
 

Check out all of the Fairy Stamps & Dies available over on the SNS website. We have a wide selection of them and they are so much fun to color and design with. Have a crafty day! Melanie