Hi Friends,
Wow when I made this card I had no idea that Heartfelt Creations would be closing it's doors by the end of the year. I sure am grateful for my time on the design team. I have learned and grown so much as an artist and team member. HC is the most organized and diligent company I have ever worked for. They have amazing customer service and strive to be better versions of themselves each and every day. I am proud to be a part of the HC Family and look forward to serving out my term and supporting them to the very end of their reign. May Linda and the family enjoy their retirement and future endeavors as the strong family unit as they are and may we always stay friends and keep in touch. 💗💗💗
Instructions:
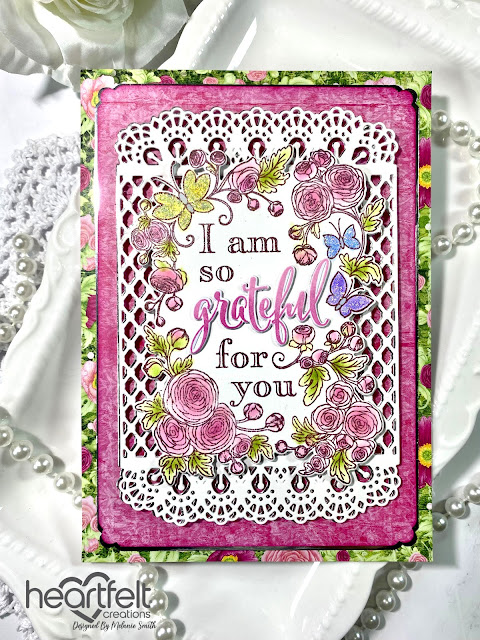
Cut a piece of white card stock measuring 10” x 7” and score in half at 5” to form a 5” x 7” card base. Cut a piece from sheet 2B from the HCDP1-2151 Floral Sentiments Paper Collection, measuring 5” x 7” and glue this to the card base. Now cut a piece of Luxe silver measuring 4 3/4” x 6 3/4” and Cut a piece from sheet 8B measuring 4 5/8 x 6 5/8. Using a decorative corner punch, punch the corners of this paper. Adhere these together with Dries Clear Adhesive and attach to the card base. Now using the HCD1-7229 Diamonds and Lace Die set cut the largest die 2x, once from white and once from Luxe Silver Card Stock. Layer and glue these together with the white on top and the silver slightly off set so that the silver is peeking out from behind the white. Attach to the card front using 3D foam tape.
Using the HCPC-31025 Grateful Floral Sentiment Cling Stamp Set, stamp out the large sentiment stamp using Archival Pigment Brilliance Ink in Crimson Copper and heat emboss using clear embossing powder. (For a similar look Light House Archival Ink could also be used) Using detail brushes and HCDA1-449 Stack and Store Daubers, color in the frame using Vibrant Fuchsia, Pink Peony, Vivid Chartreuse, Leaf Green, Buttercup, and Periwinkle Archival Inks. Die cut using the coordinating outer die. Stamp the word Grateful out using Vibrant Fuchsia and die cut using the coordinating die. Using that same die, cut 2x more in white card stock and glue all 3 layers together to add height to the sentiment. Glue to the front as shown to give the full sentiment a pop of color. Glue the entire floral sentiment to the Diamonds and Lace die cut using 3D Foam adhesive. Lastly add Stickles to the butterflies for a bit of sparkle. To complete the inside of the card simply use a piece of the gorgeous paper from the Floral Sentiments Paper Collection.
I hope you enjoyed that as much as I enjoyed creating it for each of you! Check out my personal project in the Heartfelt Creations Gallery to find out what products I used for this project.
Also, please be sure to visit the Heartfelt Creations Blog to see all of the gorgeous projects created by the other amazing design team members.


No comments:
Post a Comment