Hi Friends,
Directions:
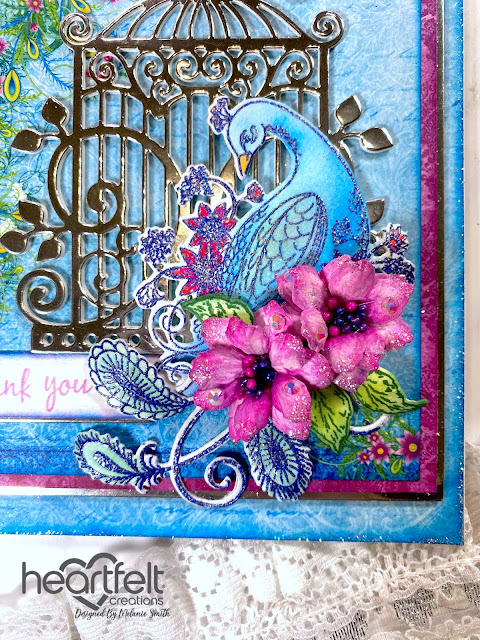
Cut a piece of white cardstock to 7” x 10” and score in half at 5”. Cut a piece from sheet 6A of the HCDP1-2148 Ornate Peacock Paper Collection measuring 5” x 7” and ink the edges using HCDA2-450 Stack and Store Daubers with Manganese Blue Archival ink. Using a Hydra Sponge and Dries Clear Adhesive sit the edges down into the sponge with glue in it and then sprinkle with glitter. Once dry, glue to the card front. Now cut a piece of Luxe Silver Card Stock to 4 3/8” x 6 1/4”. From the paper pad, cut Sheet 9B to 6 1/8” x 4 1/4” and sheet 10A to 4” x 5 7/8. Layer these 3 pieces together with Dries Clear Adhesive as shown and add to the card front using 3D foam tape. Using the birdcage die from the HCD1-7172 Sweet Lilac Scroll & Birdcage Die Set cut 3x in the HCPP1-475 Deluxe Flower Shaping Paper and 1x in the Luxe Silver Card Stock paper and glue these all together with the silver on top. Adhere this to the card front.
Using the HCD1-7451 Peacock Posies Cling Stamp Set, stamp in Versamark Ink onto Deluxe Flower Shaping Paper. Heat emboss using blue heat embossing powder. Color using both Zig Color Clean Markers as well as HCDA2-450 Stack and Store Daubers in Forget Me Not, Manganese Blue, and Viridian Archival inks. Add a little dimension to the peacock by using the Deluxe Flower Shaping Kit and shaping from the reverse side. Now stamp the flower from the HCPC-3976 Curvy Floral Frame Cling Stamp Set onto Deluxe Flower Shaping Paper 4x with Magenta Hue Archival Ink. Color using a variety of pinks including Magenta Hue, Pink Peony, and Vibrant Fuchsia. Die cut with coordinating dies. Shape using Grooved Golf Tools. Layer and add a mixture of Bright Pearl Stamens - Small to the centers. Add glitter and rhinestones for a finishing effect. Using the HCPC-3912 Cascading Wisteria Cling Stamp Set, stamp one leaf branch with English Ivy Archival ink and color with Leaf Green Archival Ink. Die cut with coordinating die then shape using the Deluxe Flower Shaping Kit. Use small pieces from this branch as the small foilage for the flowers.
Using the HCD1-7204 Arrows & Banners Die Set along with the HCDC-3846 Thank You Sentiments Cling Stamp Set, stamp out the “thank you” sentiment with Magenta Hue ink. Die cut it using the banner dies as well as a scrap of Luxe Silver Card Stock. Ink the edges of the white banner with both Magenta Hue and Manganese Blue inks for a two tone look. Then layer these flags and adhere a crystal using Dries Clear Adhesive.
To complete the card simply arrange the peacock, flowers, and leaves as desired. Once everything is arranged glue in place making sure your sentiment shows. Add a few extra crystals on the background to finish the project. Complete the inside as desired.
I hope you enjoyed that as much as I enjoyed creating it for each of you! Check out my personal project in the Heartfelt Creations Gallery to find out what products I used for this project.
Also, please be sure to visit the Heartfelt Creations Blog to see all of the gorgeous projects created by the other amazing design team members.


No comments:
Post a Comment