Hi Friends,
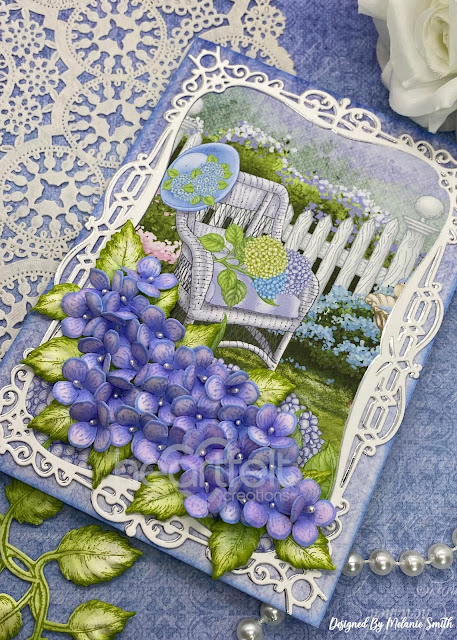
Today I have a sweet little card for you featuring a beautiful older collection from Heartfelt Creations but one I have never played with before. Can you believe that? I have collections I have never played with? So it is my goal going into the New Year to make sure I play with all my HFC sets!!! I am going to make a list of those I have not yet used and make sure I create with all of them. So here I am starting a bit early. This is the Cottage Garden Collection featuring the beautiful Hydrangea Florals.
Stamp the smallest flower 4x from the HCPC-3900 Cottage Garden Hydrangea Cling Stamp Set with Periwinkle ink onto Deluxe Flower Shaping Paper. Color the centers with Periwinkle and the petals with a light touch of Deep Purple Archival Ink. Then after die cutting with the coordinating die, deepen the edges with Periwinkle ink. Shape using the coordinating 3D Mold. Next stamp the branch without swirls from the HCD1-7193 Leafy Accents 2x with Leaf Green Archival Ink onto Deluxe Flower Shaping Paper. Lightly color with Vivid Chartreuse Archival Ink. After die cutting with the coordinating dies, darken the edges with Leaf Green ink before shaping with the coordinating 3D Shaping Molds. To finish the Hydrangeas simply add a single HCS1-457-1 Pastel Pearl Stamen - Small in white. Top Tip: Cut thread stamen in half and thread threw just one single side and adhere with a glue gun on the reverse side for the simple single stamen look.
To complete the card simply arrange the leafy accents in the best way to frame the scene that was chosen from the paper pack, any scene can be used. Then attach the individual hydrangea blooms (with a glue gun) one at a time over the leafy accents clustered close together until the desired look is achieved. For the inside of this card the second largest die from the Rectangle Filigree Frame Die set was used which completed the card perfectly.
I hope you enjoyed that as much as I enjoyed creating it for each of you! Check out my personal project in the Heartfelt Creations Gallery to find out what products I used for this project.
Also, please be sure to visit the Heartfelt Creations Blog to see all of the gorgeous projects created by the other amazing design team members.


No comments:
Post a Comment