
Hiya Friends,
Super Excited to debut the NEW RELEASE today from Heartfelt Creations. This is the Brand New Joyous Noel Collection and boy is it beautiful. Just think of all the possibilities..... My card here is titled "Joyous Sounds From Above" and I have used the gorgeous NEW die from this collection to create a brand new shaped card. Lets take a look and don't forget all the step by step instructions are below...


Instructions:
To create this shaped, top fold, card base cut a 5 X 12” piece of white cardstock and score at 7 1/4”. Next cut a second piece of white cardstock at 7 1/4 X 6. Using the third largest die from the center from HCD2-7381 Fancy Classic Oval Frame Die set cut through the folded 5 X 12” piece making sure the fold line is at the top, and the die is slightly over the fold so that it does not cut threw the fold. Next use this same die to cut the 7 1/4 x 6” piece of cardstock. Take the first white piece with the larger side facing the front. This is the card front. Attach the second white piece to the back with the seam (shorter piece) on the inside. Using the same die cut a light green piece from sheet 1B of decorative paper from the HCDP1-2142 Joyous Noel Paper Collection. This will Cover the seam on the inside. Lastly using that same die one last time, cut a piece of dark green from Sheet 11B . From the next smallest die in the Fancy Classic Oval Frame Die set cut one from white cardstock and one from HCGP-488 Luxe Gold Cardstock. Glue these together with Dries Clear Glue with white on top, slightly offsetting them, then glue to the dark green paper cut in the previous step. From the small oval die in the center cut 1 from Luxe Gold Cardstock and cut in half vertically. Next cut the HCD1-7416 Noel Decorative Die 2X in White and Luxe Gold Cardstock. Glue these together with white on top, off setting them slightly so the gold shows nicely behind the white. Glue these two pieces to the back of the dark green piece, by lining up the side and top details, see photo. Then attach card base to the back matching up the edges to the back of the dark green piece on the front.
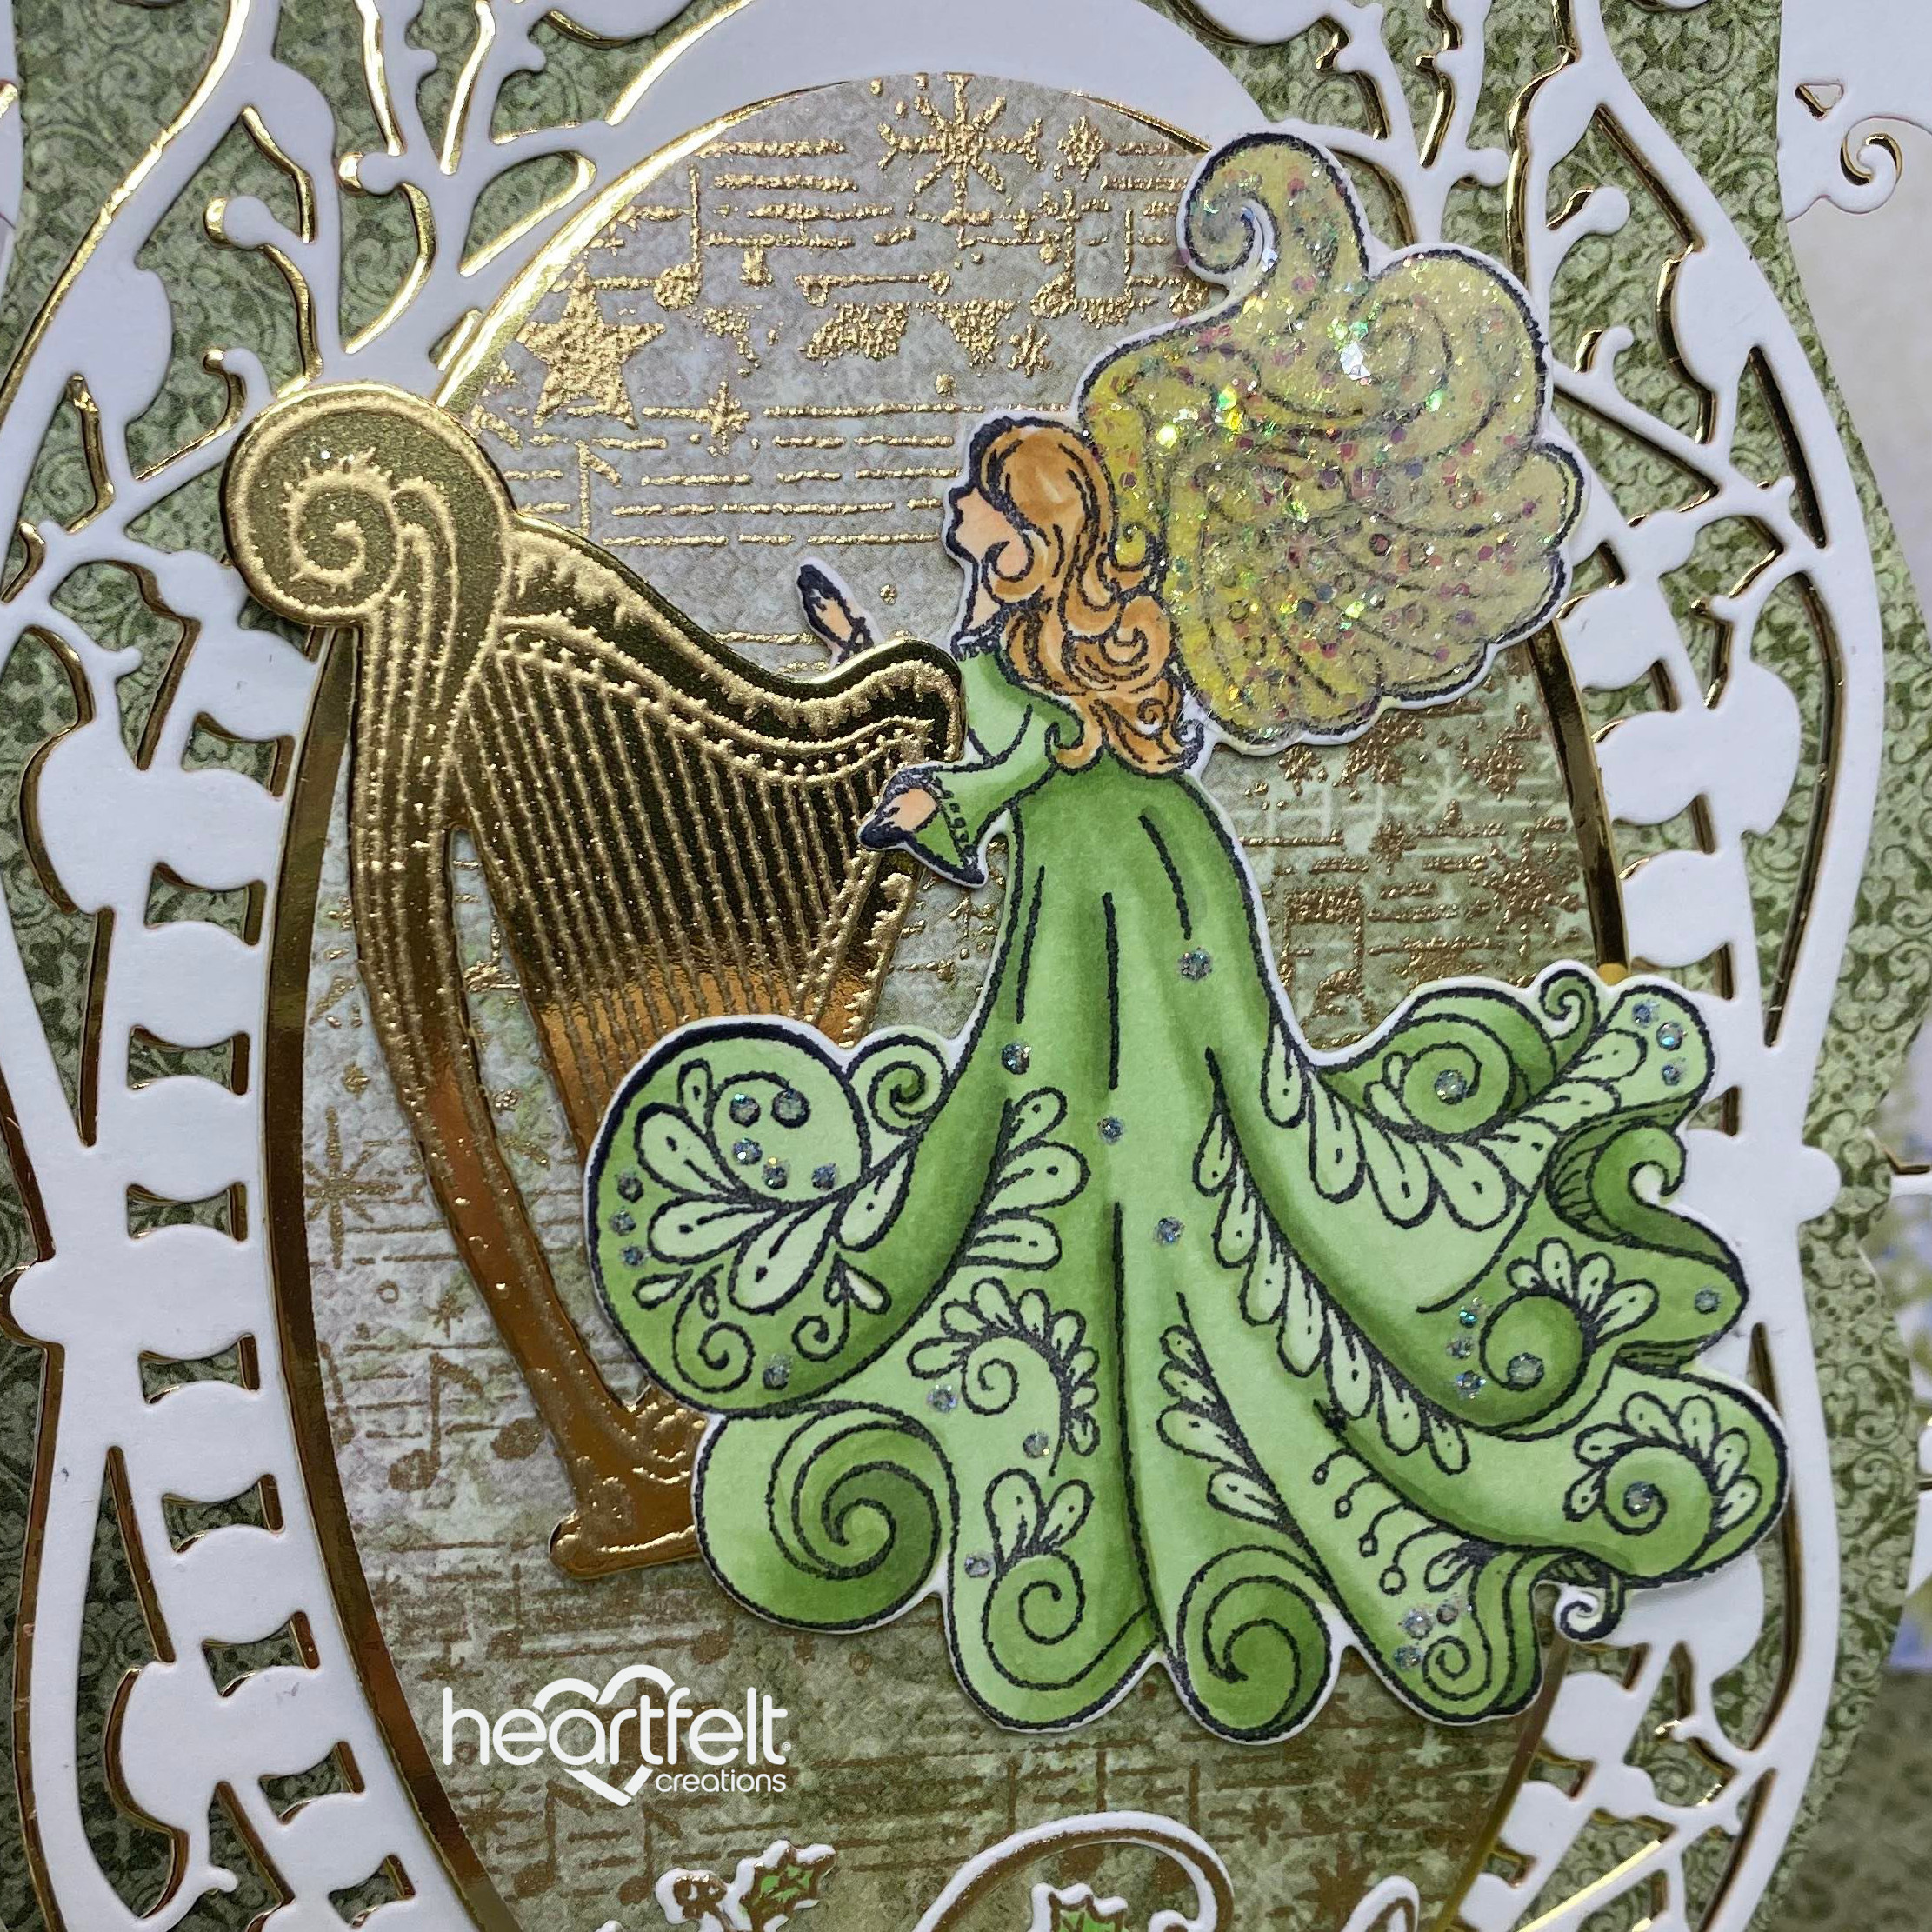
Using a stamping platform and a piece of paper from sheet 1B, use the HCPC-3998 Joyous Noel Background Cling Stamp and using the masking technique, mask off lines using scotch tape above and below just two lines of music and stamp with Encore Gold Ink and heat Emboss with Ranger Gold Embossing Powder. Do this multiple times so that the paper ends up being covered with musical notes. Then use the small oval die from the Fancy Classic Oval Frame Die to cut it out. Place the Vertically cut Luxe Gold Cardstock oval die cut behind this piece to give it a slight golden border. Attach this to the card base with 3D foam tape.
Stamp an angel from the HCPC-3996 Joyous Noel Angel Cling Stamp Set with Moments Tuxedo Black ink onto Copic X-Press It Paper. Color with Copic Markers and cut with coordinating dies. Using the Dries Clear glue with the metal tip add small dots of glue to each of the dots in the angels dress and sprinkle with Crystal Ultrafine Transparent Glitter. Then cover the angels wings completely with Dries Clear Glue and sprinkle generously with Rajni’s Chawla’s Crystal Clear Glitter, let sit for a moment, then shake off. Allow to dry completely. Stamp the Harp stamp from the same stamp set in Encore Gold Ink onto Luxe Gold Cardstock and heat emboss, then cut with coordinating die. Glue the harp into the angels arms and add 3D Foam Dots to the back before applying the angel to the center top of your oval. Lastly, Stamp the “Noel” stamp from the HCPC-3997Starry Noel Angel Cling Stamp Set in Encore Gold Ink and Heat Emboss in Ranger Gold embossing powder then cut out with coordinating die. Attach this to the bottom center of the oval to finish the card.
I hope you enjoyed that as much as I enjoyed creating it for each of you! Check out my personal project in the Heartfelt Creations Gallery to find out what products I used for this project.
Also, please be sure to visit the Heartfelt Creations Blog to see all of the gorgeous projects created by the other amazing design team members.

No comments:
Post a Comment