Hello My Dear Friends,
I have an Elegant Wednesday Inspiration post for all of you today. Are you all ready for this? It is titled "A Sweet Pea Story" and it goes a little bit like this.....
Instructions:
Cut a piece of white cardstock 6 1/2 x 10 1/2” and score in half at the 5 1/4” mark. Using the largest die from HCD1-7260 Booklet Basics Die, cut through both layers of cardstock making sure to allow the top of the book die to hang over the folded edge to preserve the fold. This will be the fold along the top of the card base. Using the same die, cut a piece of paper from sheet 6A (pink) of the HCDP1-2137 Sweet Pea Paper Collection. Using the card base as a guide trim the top and glue to the inside of the card using Designers Dries Clear Adhesive. Also using sheet 6A cut a piece with the 3rd smallest Booklet Basics Die for the top layer of the card base. From HCD2-7261 Booklet Frames Die cut 2 pieces, one from sheet 11B, and one from Luxe Silver Cardstock. Next do the same with the 3rd smallest Booklet Frame die with sheet 5B (Green), and Luxe Silver Cardstock. Before adhering these layers together ink the larger pink frame with Mulberry and the green frame in Olive Archival Inks. Then layer with their matching Luxe Silver pieces making sure to off set the silver behind the colored decorative paper. Now simply glue the layers all together using Dries Clear Glue and set aside.
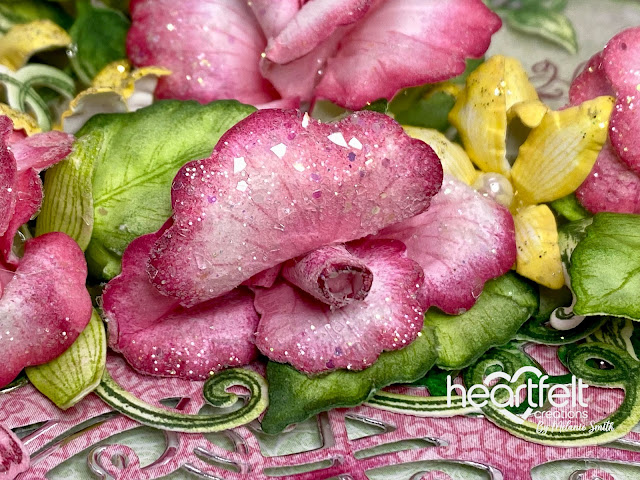
Using the HCPP1-475 Deluxe Flower Shaping Paper, stamp the small set 4x, and the large set 1x using Rose Madder Archival ink from the HCPC-3980 Sweet Pea Cling Stamp Set. Also from this set stamp the calyx 5x in Olive and 8x in Chrome Yellow Archival Inks. Using a stamping platform along with the Stack and Store Daubers, for multi color stamping, stamp the smaller floral from the HCPC-3981 Vining Sweet Pea Cling Stamp Set in both Mulberry and Olive Archival Inks. Before die cutting each stamped image, lightly color each with the lightest archival colors that coordinates with the outline color using a make blending brush, then cut with coordinating dies.
Using the Stack and Store Daubers, ink the edges of the flowers, leaves, and parts of the vines with the darkest shades of coordinating ink colors before running each item through the coordinating shaping mold. The Sweet Pea flowers were hand shaped even more after coming out of the shaping mold using a HCS1-457-3 Pastel Bead Stamens- Medium in light pink along with a little water and hot glue. Then a Calyx was added to the backside of each. Lastly each Sweet Pea received a dusting of Rajni Chawla’s Crystal Clear by adding Dries Clear Glue to a Hydra Sponge before sprinkling, then just tap off.The yellow Calyx were turned into filler flowers by hand shaping them with a little water and the smallest Grooved Golf Tool. Then a single HCS1-457-1 Pastel Pearl Stamens - Medium in white was added and secured with hot glue before adding Ultra Transparent Glitter in Clementine in the same method as stated above. For the vines use the HCST1-401 Deluxe Flower Shaping Kit and simply add a little texture to them by using a stylus on the backside of the flowers and leaves.
Before beginning to assemble make sure to stamp the sentiment using the HCPC-3846 Thank You Sentiments Cling Stamp Set before attaching the flowers as these flowers are very full and may make stamping difficult. Arrange and attach the flower oasis with a hot glue gun to the card to complete.
I hope you enjoyed that as much as I enjoyed creating it for each of you! Check out my personal project in the Heartfelt Creations Gallery to find out what products I used for this project.
Also, please be sure to visit the Heartfelt Creations Blog to see all of the gorgeous projects created by the other amazing design team members.


No comments:
Post a Comment